Somehow during the holiday season, my money always seemed to disappear. The decorations around the mall, the songs played in stores and all the sales called out, “Noelle, buy more gifts!”
I found myself buying gifts not only for my close friends and family but also for practically everyone I know. I was spending too much money. I needed to find an inexpensive alternative.
One day a few years ago, I passed by a Michaels craft store in Burbank. The solution immediately clicked. I began hand-making gifts rather than buying them at the mall.
There are many benefits to making gifts. For one, you won’t spend as much money as you would at a mall. Though handmaking gifts may take some time, it’s definitely manageable. Also, you can easily personalize the gifts for a specific person. Most importantly, it’s the thought that counts! I’m sure that your friends and family would love to receive something that’s handmade. My best friend was so excited to receive the personalized tote bag I made for her last year.
If you’re interested in making your own gifts but don’t know where to start, here are some ideas all less than $10. Although I do think that I’m a little craftier than most of my friends, these projects are so easy and quick to do that even my younger sister finds them simple to make.

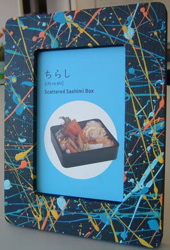
Picture Frame
From the craft store …
unfinished wooden picture frame ($1)
acrylic paint
paintbrushes
puffy paint (optional $1 per tube) 1. Paint! 2. Add in your picture once the frame is completely dry.
For a splatter-paint frame, paint a base color first. Once dry, put a blob of paint (in any color other than the base color) on the paintbrush and flick the brush towards the frame, creating a splattered look. (This should be done outside or against a backdrop to avoid making a mess.)
To personalize the frame, use puffy paint to write on the frame. You can also add small items such as fake flowers, little plastic toys and buttons by using a glue gun to stick them onto the frame.

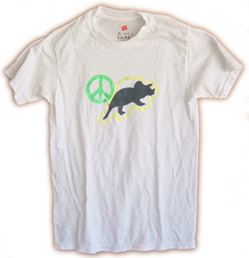
T-shirt
From the craft store …
fabric paint ($2 per bottle)
paintbrushes
From Target …
T-shirts ($5 for a pack of 4)
From an office supply store …
adhesive contact paper ($3 per roll)
.jpg)
Flower Pot
From the craft store …
ceramic flower pot ($1)
acrylic paint ($1 per tube)
paintbrushes ($3 for a pack of 10)
From a nursery, such as at Home Depot …
flowers ($3)
(Great idea for mothers, grandmothers, and green thumbs alike!)